By GLOTRENDS | 01 November 2020 | 1 Comments
CPU Cooler CH01 Installation
Attention:
1) Before installing the CPU cooler, be sure to turn off your computer. Unplug the power cord from the power outlet to prevent damage to your computer.
2) Place the computer system on a stable surface to prevent improper installation resulted from shaking.Step 1: Installing CPU bracket (skip this step if the CPU bracket has been installed on motherboard correctly)
a) Put the four hollow transparent pins into the corresponding holes (775/115x/1366) on the bracket. For example of LGA 775, the pins should into 775 position of bracket holes.
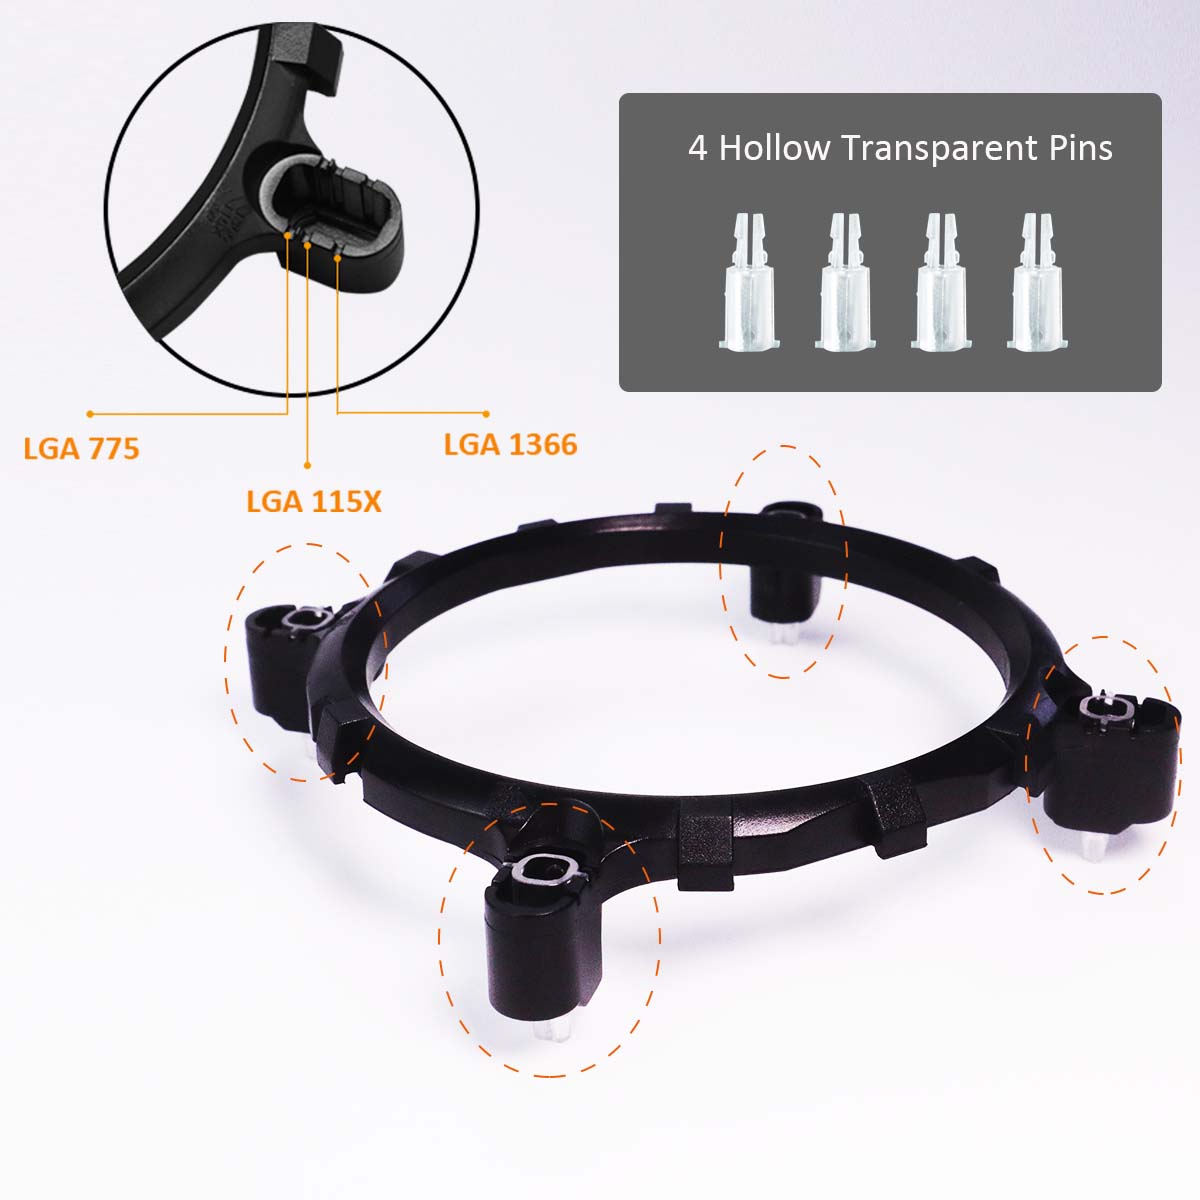
b) Then put the bracket on top of the motherboard, and lower the bracket in a way that the pins poke through the holes on the motherboard.
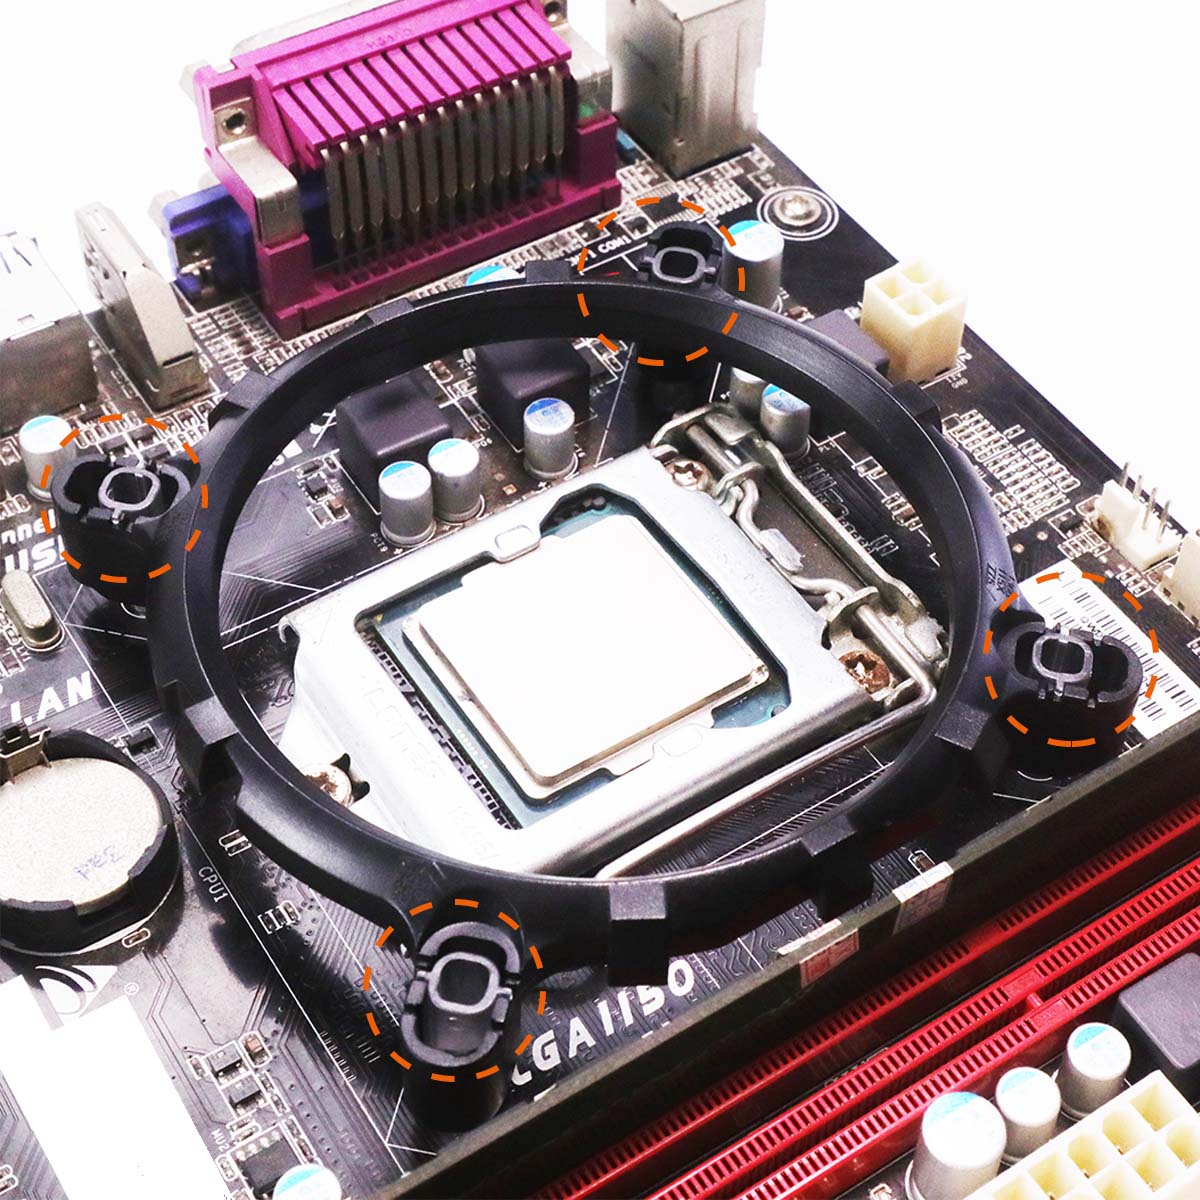
c) Then put the 4 black solid cap pins poke through those hollow transparent pins. The bracket will attach to the motherboard firmly. To remove the bracket, you need to move the black solid cap pins first, then the bracket can be pulled out from the motherboard.


Step 2: Install CPU Cooler

a) Before installing the CPU cooler, please first add a thin layer of thermal grease on the surface of the CPU.

b) Place the CPU cooler on the CPU.
Hook the CPU cooler clip to the mounting lug on one side of the CPU bracket. On the other side,push straight down on the the CPU cooler clip to hook it to the mounting lug on the CPU bracket.

c) Finally, attach the 3PIN power connector of the CPU cooler to the CPU fan header (CPU_FAN) on the motherboard. If the motherboard has a 4PIN CPU FAN interface, align the 3PIN power supply with the bayonet and insert it into the CPU FAN interface.


Recently Reviews
READ MORELeave a Reply
Your email address will not be published.Required fields are marked. *